As manufacturing, quality inspection, and reverse engineering continue to move toward higher precision and faster feedback loops, 3D scanning has become a practical production tool rather than a laboratory novelty. Among the many technologies available, laser scanning and structured light scanning are the two most widely adopted. Each has clear strengths, limitations, and ideal application scenarios.
Choosing between them is not about which technology is “better,” but which one fits your parts, workflow, and long-term inspection goals.
Drawing on nearly a decade of experience in dimensional measurement and inspection—from CNC tool presetters to probes, and now 3D scanning and analytical instruments—Suzhou Evolution Technology Co., Ltd. has seen firsthand how this choice affects real production outcomes.
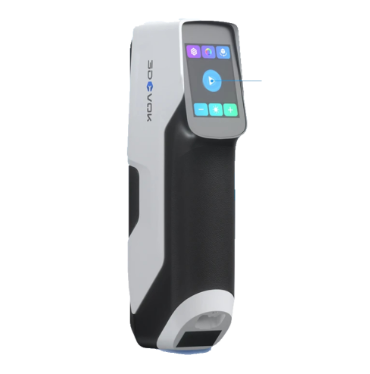
A Brief Look at 3D Scanning in Industrial Practice
Before comparing technologies, it helps to understand what industrial users expect from a 3D scanner today:
-
Reliable dimensional accuracy
-
Repeatable results on the shop floor
-
Compatibility with inspection and analysis software
-
Reasonable scanning speed for production cycles
-
The ability to handle real-world parts, not just ideal surfaces
These expectations are shaped by years of experience in CNC machining and inspection. Suzhou Evolution Technology, founded in 2015 with its first CNC tool presetter, entered the market by solving practical measurement problems close to the machine tool. This mindset continues to influence how 3D scanning is evaluated—not as a standalone gadget, but as part of a broader inspection ecosystem.
How Laser 3D Scanning Works
Laser 3D scanners project a laser line or point onto the surface of an object. Cameras capture the deformation of the laser as it moves across the part, and software reconstructs the surface geometry through triangulation.
Key Strengths of Laser Scanning
-
High Accuracy on Complex Geometry
Laser scanners are particularly effective for capturing sharp edges, deep grooves, and complex freeform surfaces. -
Good Performance on Dark or Metallic Surfaces
Compared to structured light, laser scanning often performs better on dark, shiny, or partially reflective materials, sometimes with minimal surface preparation. -
Flexible Scanning Range
Laser scanners can handle both small precision parts and larger components, depending on system configuration. -
Strong Adoption in Tooling and Machined Parts
In industries familiar with CNC probes and tool setting systems, laser scanning feels like a natural extension of existing measurement methods.
Typical Limitations
-
Slower data acquisition for large surfaces
-
Sensitivity to vibration in handheld setups
-
Safety considerations when using higher-power lasers
Laser scanning is often chosen when precision on complex features outweighs the need for rapid full-field capture.
How Structured Light 3D Scanning Works
Structured light scanners project a series of patterns—usually stripes—onto the object. Cameras capture how these patterns deform across the surface, allowing software to reconstruct the 3D shape.
Key Strengths of Structured Light Scanning
-
High-Speed Full-Field Capture
Structured light scanners can capture large areas in a single shot, making them efficient for scanning entire parts quickly. -
Excellent Data Density
The resulting point clouds or meshes are typically very dense, which is ideal for surface inspection and deviation analysis. -
Strong Suitability for Inspection and Analysis
When paired with inspection software, structured light scanners are highly effective for GD&T checks, surface comparison, and deformation analysis. -
Ideal for Controlled Environments
In inspection rooms or laboratories, structured light scanners deliver stable, repeatable results.
Typical Limitations
-
Sensitivity to ambient light
-
Challenges with highly reflective or transparent surfaces
-
Often requires surface treatment such as matte spray
Structured light scanning excels where speed and surface coverage are critical, especially in inspection-focused workflows.
Comparing Laser and Structured Light in Real Applications
CNC Machining and Tooling
In CNC environments, accuracy and repeatability are non-negotiable. Laser scanning is often favored for:
-
Tool wear analysis
-
Complex machined features
-
Small to medium-sized precision components
Structured light, on the other hand, is well suited for:
-
First article inspection
-
Full-part deviation analysis
-
Comparing machined parts to CAD models
Suzhou Evolution Technology’s background in CNC tool presetters and probes, starting in 2015 and expanding rapidly in 2017, reflects this dual need: point-based precision and full-field inspection working together.
Quality Inspection and Metrology
By 2020, as market demand shifted toward comprehensive inspection solutions, full-field data became increasingly valuable. Structured light scanning gained traction because it allows inspectors to see not just whether a dimension is out of tolerance, but where and why deviations occur.
Laser scanning remains relevant for high-precision verification tasks, especially when specific features are critical to function.
In practice, many inspection departments benefit from using both technologies, depending on the inspection stage.
Reverse Engineering and Product Development
For reverse engineering:
-
Laser scanning is effective for capturing intricate mechanical features and functional surfaces.
-
Structured light scanning is better for capturing overall shape and surface continuity.
When Suzhou Evolution Technology expanded into 3D scanning products and services in 2022, many customers were not replacing existing tools, but complementing them—using scanning data alongside traditional measurement methods.
Production Speed vs. Detail
A key decision factor is whether your priority is speed or feature detail.
-
If you need to scan large parts quickly for surface comparison, structured light is often the better choice.
-
If you need precise data on fine features, laser scanning may deliver more reliable results.
This trade-off becomes even more important as production volumes increase, something many manufacturers experienced during periods of rapid growth similar to Suzhou Evolution Technology’s expansion around 2020.
Environmental and Operational Considerations
No scanner operates in a vacuum. Consider:
-
Lighting conditions
-
Available space
-
Operator skill level
-
Integration with existing software
Structured light scanners usually prefer controlled lighting and stable setups. Laser scanners may tolerate harsher shop-floor environments but require careful handling to ensure accuracy.
As inspection solutions evolved beyond hardware, Suzhou Evolution Technology expanded into analytical instruments and services in 2024, reflecting a broader industry trend: measurement data is only valuable when it can be analyzed, interpreted, and acted upon.
Looking Ahead: Hybrid and Vision-Based Inspection
The future of 3D inspection is not strictly laser or structured light. Hybrid systems and 3D vision-based inspection are gaining attention, combining speed, accuracy, and automation.
Suzhou Evolution Technology’s roadmap includes expanding into 3D vision inspection products and services, aligning with the growing demand for automated, inline quality control. In these systems, lessons learned from both laser and structured light scanning inform better design choices.
How to Choose the Right Technology for Your Needs
Ask yourself the following practical questions:
-
What size and material are your parts?
-
Do you prioritize speed or feature-level accuracy?
-
Will scanning happen on the shop floor or in a controlled room?
-
How will the data be used—inspection, reverse engineering, or both?
-
Can the scanner integrate with your existing inspection workflow?
There is no universal answer. The right choice depends on your production reality, not marketing claims.
Conclusion
Laser and structured light 3D scanning technologies each serve distinct but overlapping roles in modern manufacturing and inspection. Understanding their differences allows you to make informed decisions that improve accuracy, efficiency, and long-term value.
From its origins in CNC tool presetting in 2015 to its continued expansion into 3D scanning, analytical instruments, and future 3D vision inspection solutions, Suzhou Evolution Technology Co., Ltd. reflects how measurement technology evolves when driven by real industrial needs. The same principle applies when selecting a 3D scanner: choose the tool that fits your process, not the trend.
www.szevotech.com
Suzhou Evolution Technology Co., Ltd.

